This walkthrough follows the original Duplicator migration process: install the plugin, build a package, prepare the destination server, run the installer and clean up afterward. The screenshots show the interfaces used in the source tutorial.
Step 1: Install the Duplicator plugin
- Sign in to the WordPress administration area of the website you want to migrate.
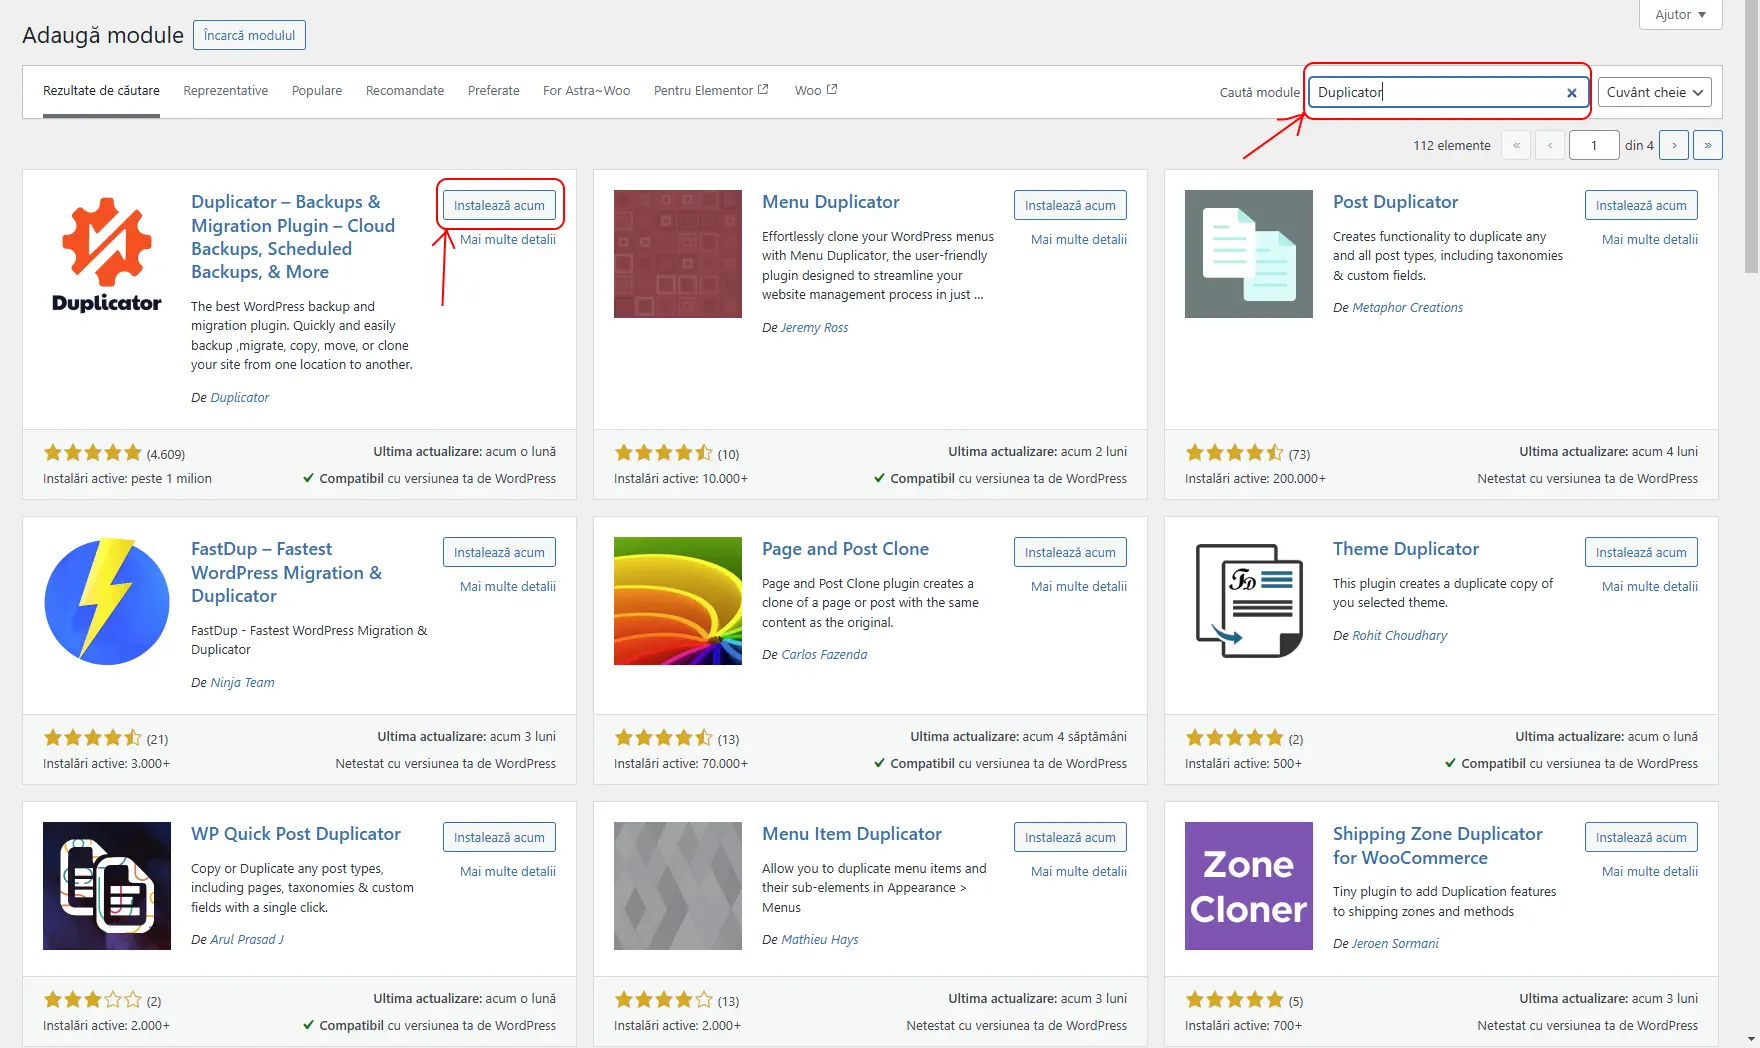
- Go to Plugins > Add New.
- Search for Duplicator.
- Select Install Now, then Activate.
Step 2: Create a migration package
- After activating the plugin, go to Duplicator > Packages.
- Select Create New.
- Follow the package-creation wizard:
- Select Next to scan the website.
- Review the scan results and address any problems.
- Select Build.
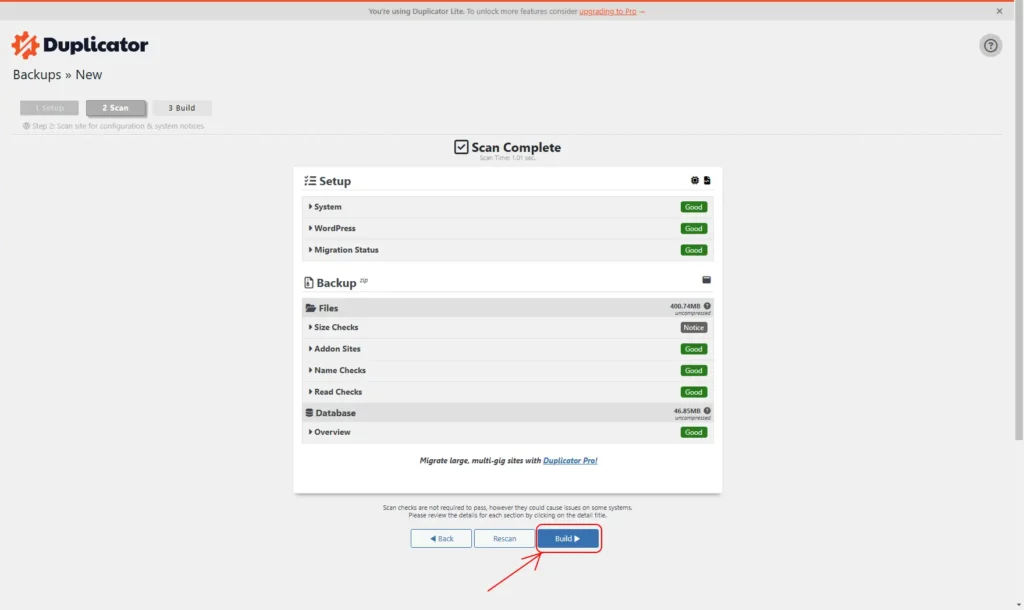
- When the build finishes, download the installer.php file and the package archive (.zip).
Step 3: Prepare the destination server
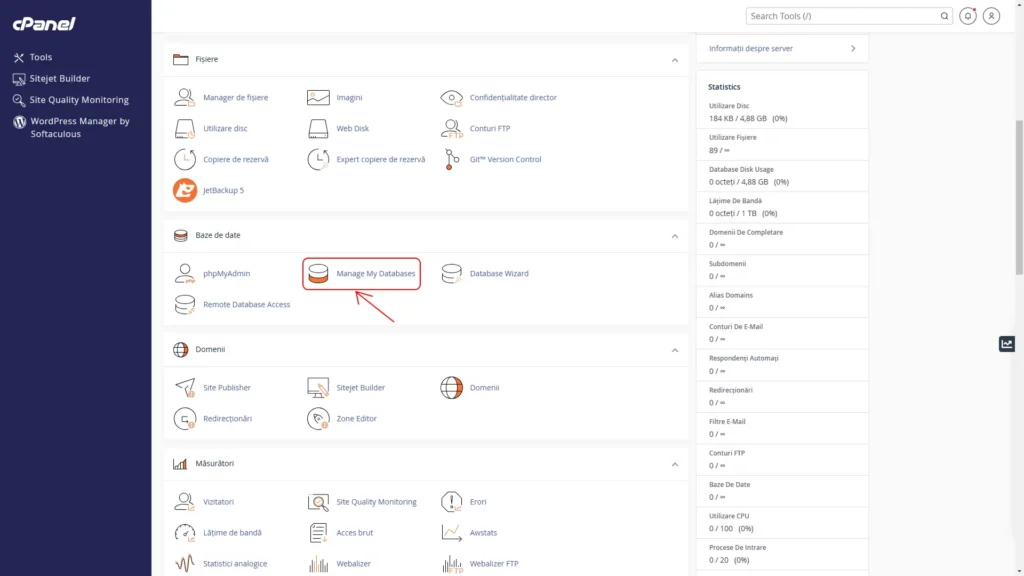
- Sign in to the destination server's cPanel. This cPanel demonstration illustrates the control panel.
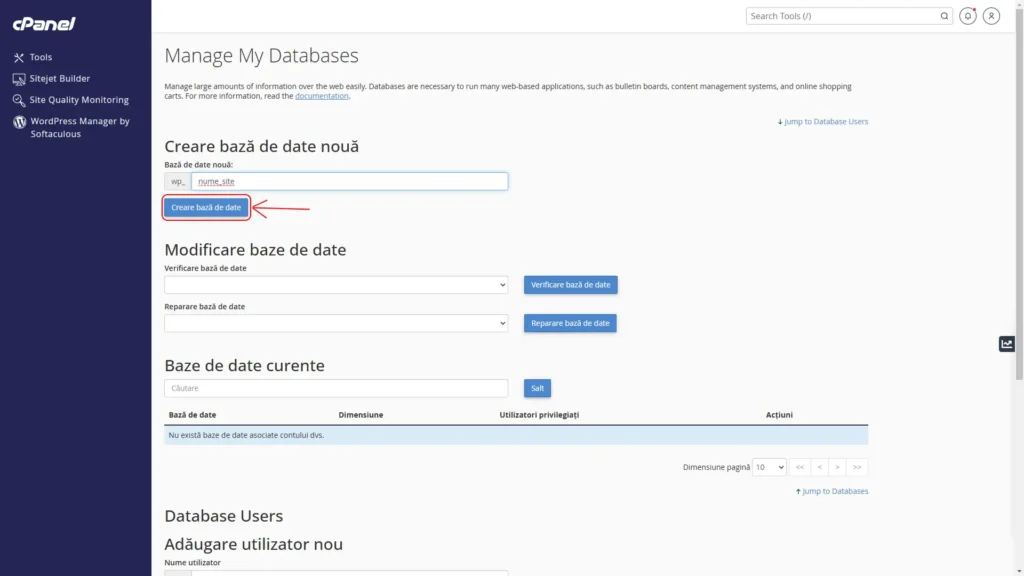
- Create a new database using phpMyAdmin or the available database-management tool.
- Record the database name, user, password and server address.
Create the new database
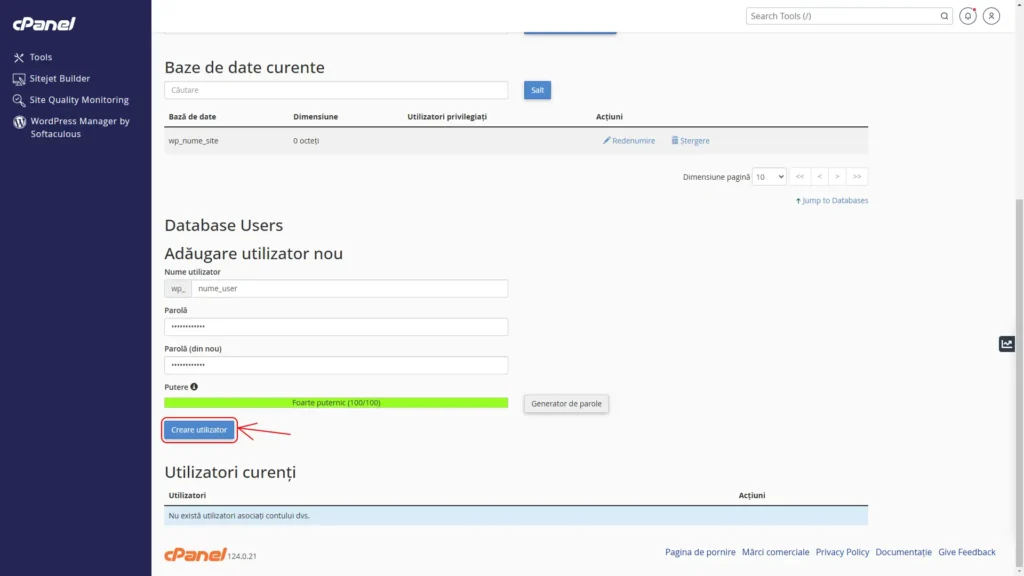
Create a database user
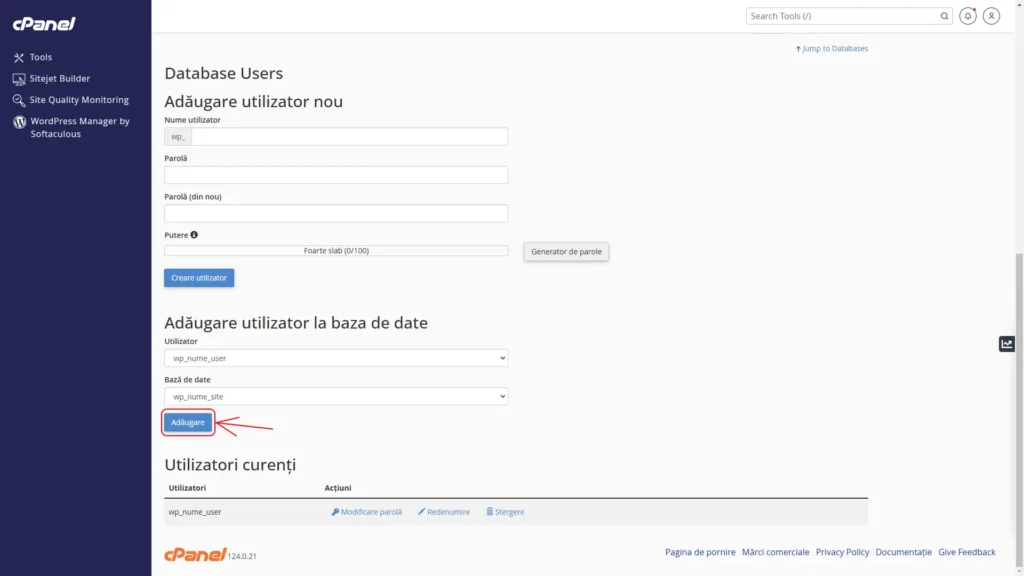
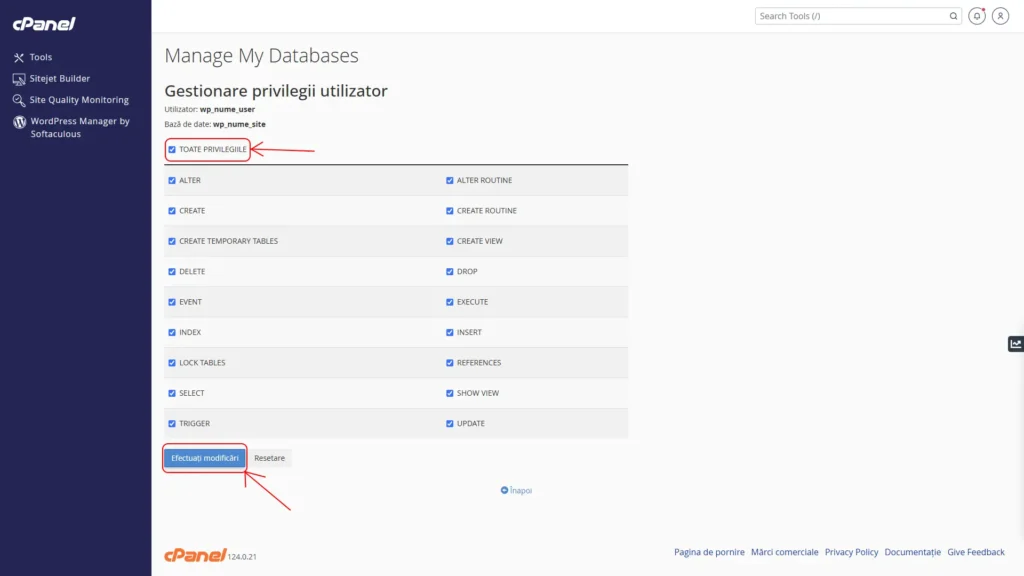
Give the user access to the database
- Upload the files to the new server:
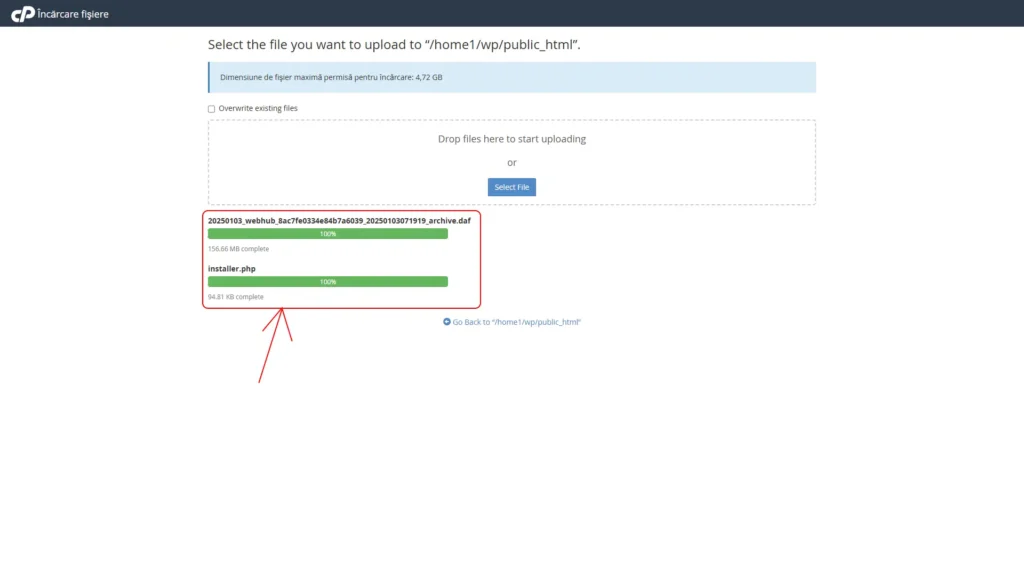
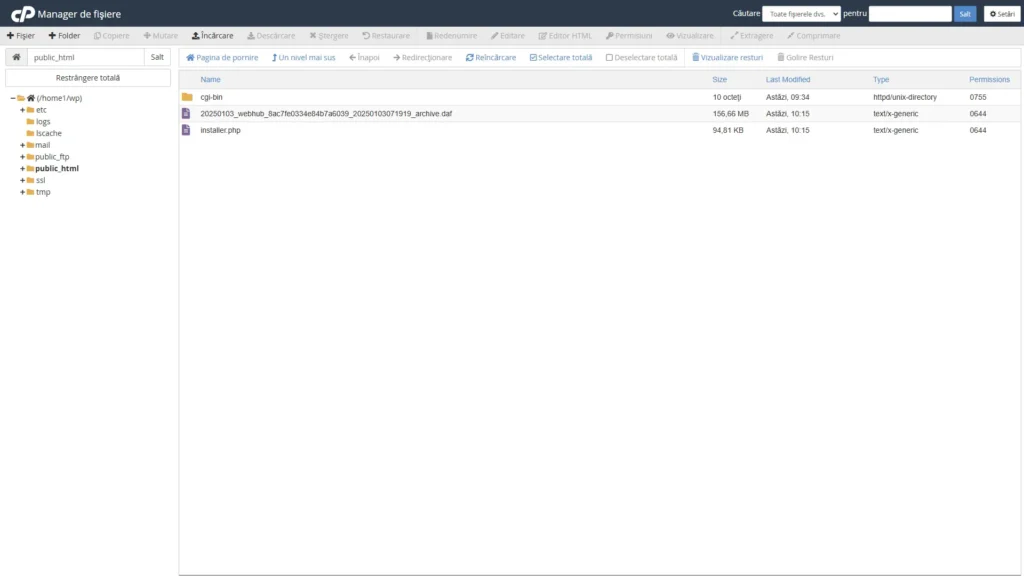
- Use cPanel File Manager or an FTP client such as FileZilla to upload installer.php and the package archive to the website's root directory.
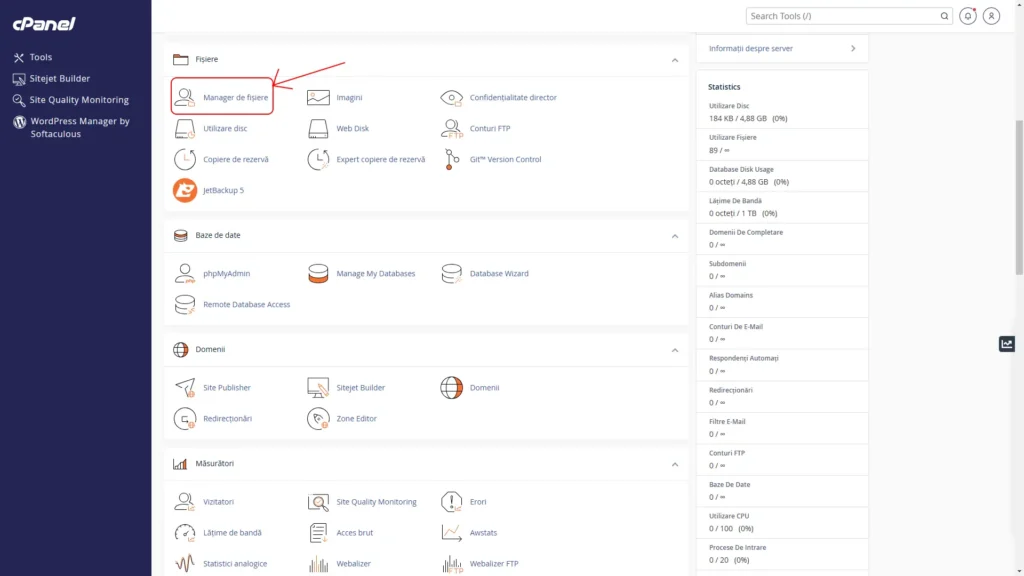
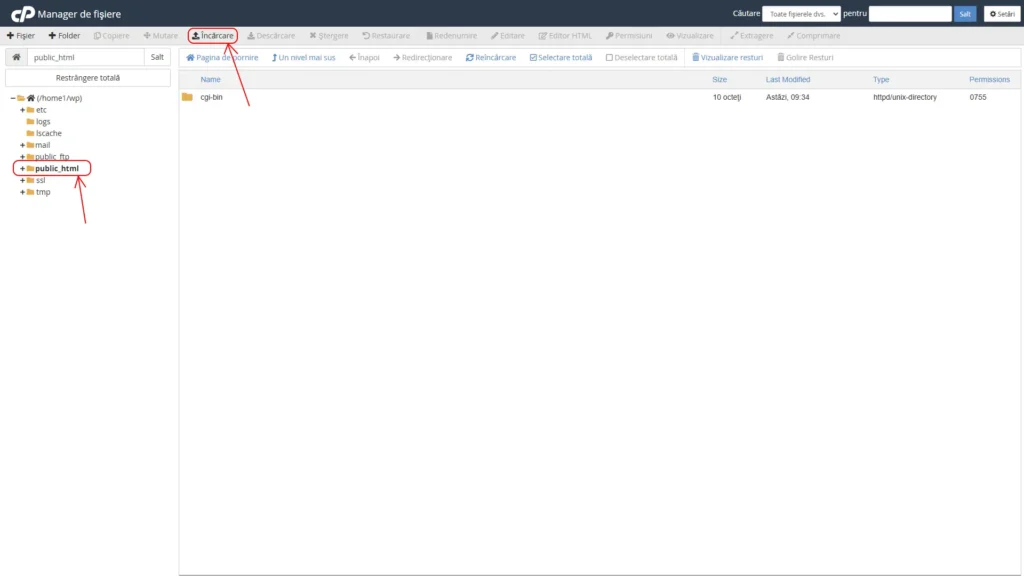
Upload the locally saved installer and package archive into the destination website's root directory.
Step 4: Run the migration
- Open a browser and visit:
https://your-domain.com/installer.php - Follow the installer prompts:
- Enter the database connection details.
- Select Validate to test the database.
- If validation succeeds, select Next.
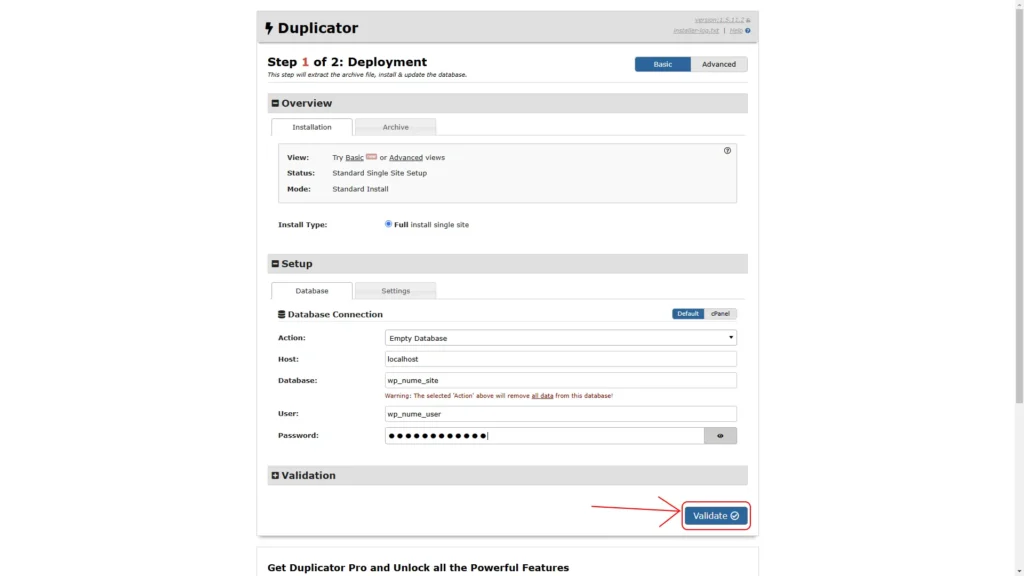
- Confirm the website details and complete the process.
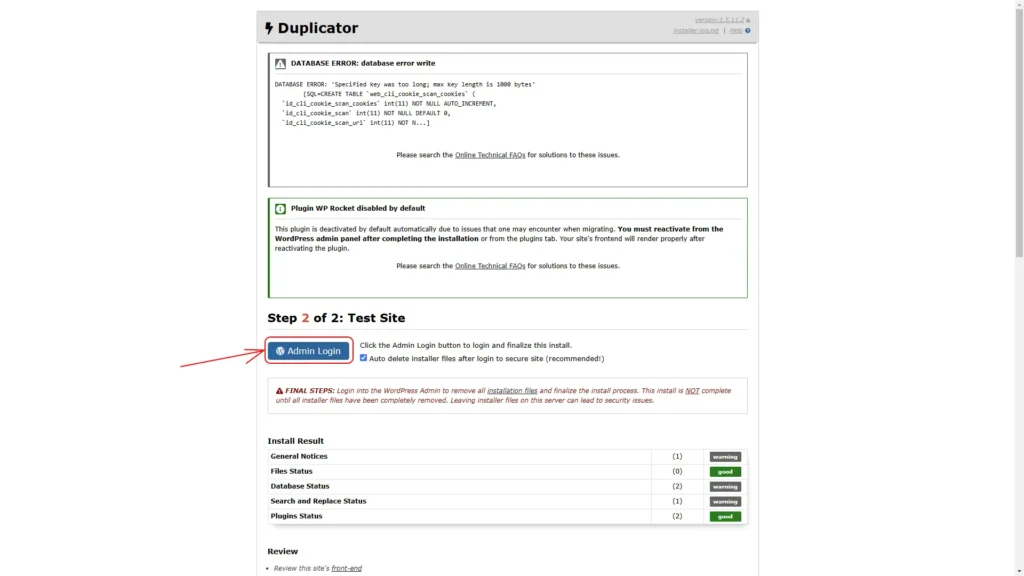
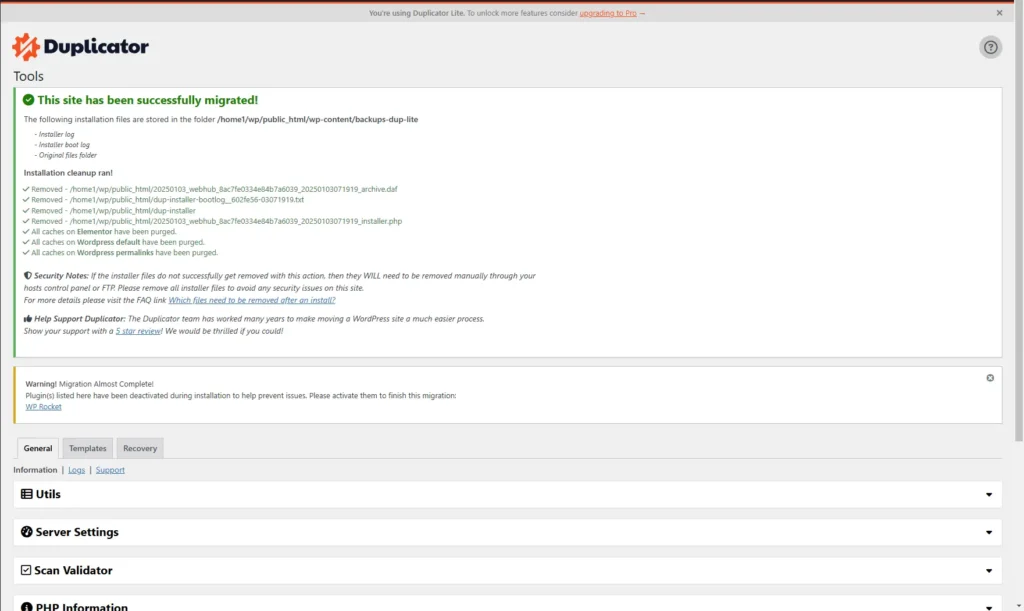
Step 5: Refresh permalinks and remove installation files
- Sign in to the migrated WordPress website.
- Go to Settings > Permalinks and select Save Changes.
Conclusion
The Duplicator migration is complete once the website has been restored successfully. Check that every page works as expected, and make sure temporary installation files have been removed for security.
After migration, review performance and technical SEO to confirm that the new environment supports the site properly. Hostnary's ongoing WordPress management covers the maintenance, monitoring and technical review needed after the move.