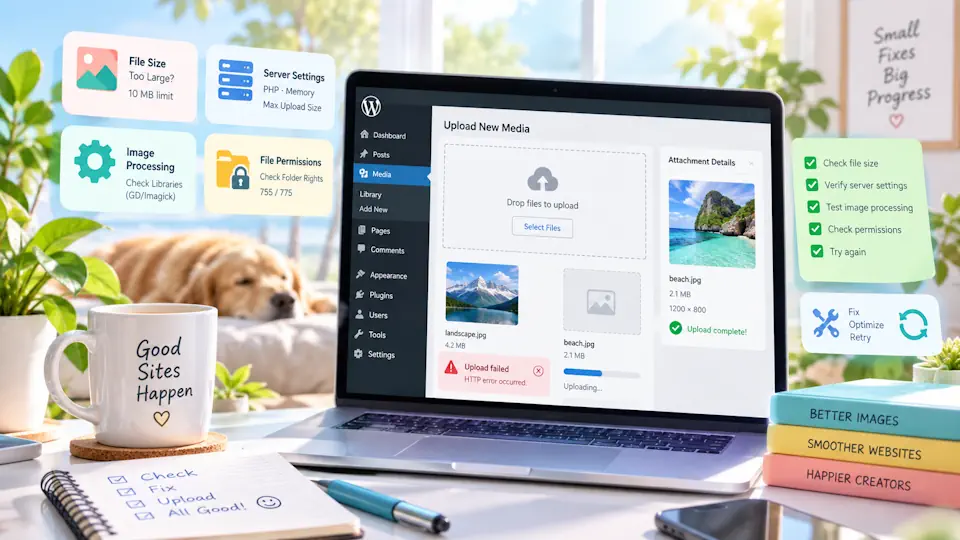
A generic HTTP error while uploading images in WordPress can be frustrating because the message does not identify one specific failure. The upload may be rejected before WordPress receives it, the original file may reach the server but fail during image processing, or a security, PHP or web-server rule may interrupt the request.
This guide explains how to diagnose and fix WordPress image upload HTTP errors methodically, starting with the fastest checks and moving toward PHP, server, image-processing and security-layer causes.
The goal is not to apply random snippets until the upload works. A better approach is to identify where the request fails, fix that layer and verify that WordPress can upload the original image and generate its derived image sizes correctly.
What does the WordPress image upload HTTP error mean?
WordPress has historically shown a generic HTTP error when the Media Library upload request fails without a more specific user-facing explanation. Newer versions may also display messages such as:
- The server cannot process the image.
- Post-processing of the image failed.
- The response is not a valid JSON response.
- An explicit HTTP status such as 413, 403, 429 or 500.
These messages can look similar from the WordPress dashboard while coming from very different layers.
| Symptom | Common layer | Typical cause |
|---|---|---|
| 413 Request Entity Too Large | Web server, reverse proxy or CDN | Request body exceeds an upload limit |
| 403 Forbidden | WAF, security plugin or permissions | Upload request blocked by a security rule |
| 429 Too Many Requests | Rate limiting | Firewall or proxy is throttling requests |
| 500 Internal Server Error | PHP/application/server | Fatal error, memory exhaustion, image library failure or bad server rule |
| Original file uploads but thumbnails fail | Image processing | Imagick/GD resource problem, metadata issue, timeout or memory pressure |
| Only large images fail | Upload or processing limits | File size, dimensions, memory, execution time or proxy body limit |
Start with the fastest tests
Before editing PHP configuration or server files, run a few controlled tests. They often reveal the failing layer immediately.
- Try a small JPEG, for example 1000×700 pixels and under 500 KB.
- Try the same image with a simple filename such as
test-image.jpg. - Try a different file format such as JPEG instead of PNG.
- Open Tools → Site Health and look for PHP, REST API or filesystem warnings.
- Inspect the upload request in browser Developer Tools → Network and note the HTTP status code.
- Check the PHP and web-server error logs at the time of the failed upload.
If a small file works but a large file fails, concentrate on size, memory and processing limits. If every image fails, investigate permissions, PHP errors, image libraries, security rules and plugin conflicts.
1. Check the real upload size limits
The Media Library displays a maximum upload size, but several layers can impose their own limits. The effective limit is usually the smallest limit in the request path.
Important PHP settings include:
upload_max_filesize
post_max_size
memory_limit
max_execution_time
max_input_time
A sensible relationship is:
post_max_size > upload_max_filesizeFor example:
upload_max_filesize = 64M
post_max_size = 80M
memory_limit = 256M
max_execution_time = 120
These are examples, not required values. Large photographic images may need much more memory during decoding and thumbnail generation than their compressed file size suggests.
A 10 MB JPEG can require substantially more than 10 MB of working memory once decompressed into pixels.
Where should you change PHP limits?
Use the configuration method supported by your hosting stack:
- cPanel or another hosting control panel.
- The active
php.ini. - A PHP-FPM pool configuration.
.user.iniwhen supported.- Your managed hosting dashboard.
Avoid blindly adding php_value directives to .htaccess. They work only with compatible Apache PHP handlers and can produce a 500 error on PHP-FPM or other configurations.
2. A 413 error usually means the request is too large
If Developer Tools or the WordPress app reports HTTP 413, the request is being rejected because its body exceeds a configured limit. This typically occurs before WordPress can process the file.
Possible limits include:
- PHP
upload_max_filesizeandpost_max_size. - Nginx
client_max_body_size. - Apache or hosting-level request limits.
- A reverse proxy.
- A CDN or web application firewall.
For Nginx, a hosting administrator might use a directive such as:
client_max_body_size 64m;Changing WordPress memory constants will not fix a proxy that rejects the request before PHP receives it.
3. Check WordPress and PHP memory
Image processing is memory intensive. WordPress must decode the source image and may generate several sizes defined by WordPress core, the active theme and plugins.
If PHP logs show memory exhaustion, increase the PHP memory limit at the server level where possible.
WordPress also supports memory constants in wp-config.php:
define( 'WP_MEMORY_LIMIT', '256M' );
define( 'WP_MAX_MEMORY_LIMIT', '256M' );
These constants can request more memory for WordPress, but they cannot override a lower hard limit imposed by PHP or the hosting platform. If PHP is capped at 128 MB, defining 256 MB in WordPress does not guarantee that 256 MB becomes available.
4. Check image dimensions, not only file size
Two images can have similar file sizes but dramatically different processing requirements. A highly compressed 9000×6000 JPEG may be only a few megabytes on disk while requiring a large amount of memory when decoded.
As a diagnostic test:
- Resize the image to a more typical web dimension.
- Export a fresh JPEG or WebP copy.
- Remove unnecessary metadata.
- Try uploading the resized version again.
WordPress can scale very large images during processing. The commonly displayed suggestion around 2560 pixels is related to large-image handling and processing guidance; it is not the same thing as the PHP upload-file-size limit.
5. Determine whether the file uploads but post-processing fails
An important diagnostic distinction is whether WordPress receives the original image successfully.
After a failed attempt, check:
- Does the original file exist under
wp-content/uploads/YYYY/MM/? - Was a Media Library attachment created?
- Are generated sizes such as
-150x150or other thumbnails missing?
If the original exists but derived sizes are missing, the upload itself probably succeeded and the failure occurred during image post-processing.
That points toward Imagick/GD, memory, execution time, metadata, filesystem or plugin hooks rather than a simple maximum upload size.
6. Check Imagick and GD
WordPress uses available PHP image editors to resize and manipulate uploaded images. Common libraries are ImageMagick/Imagick and GD.
Problems can occur when:
- Imagick is installed but misconfigured.
- ImageMagick resource limits are too restrictive.
- The process runs out of memory.
- A specific image contains metadata that triggers an image-library issue.
- A hosting update changes the behavior of an image-processing extension.
Check Tools → Site Health → Info → Media Handling to see which image-processing capabilities WordPress detects.
If failures began after a server or PHP change, testing the alternative image editor can be useful for diagnosis. This should be treated as a troubleshooting step rather than automatically disabling a working Imagick installation permanently.
Temporary diagnostic: prefer GD
A developer can temporarily force WordPress to try GD first:
add_filter( 'wp_image_editors', function () {
    return array( 'WP_Image_Editor_GD', 'WP_Image_Editor_Imagick' );
} );
Add diagnostic code through a controlled custom plugin or development mechanism, not directly to a production theme unless you understand the maintenance implications.
If uploads suddenly work with GD, investigate the Imagick/ImageMagick configuration and server logs rather than considering the problem permanently solved.
7. Check file and directory permissions
WordPress needs to write to the uploads directory. Incorrect ownership or permissions can prevent an upload or prevent WordPress from creating resized copies.
The important path is usually:
wp-content/uploads/Typical Linux WordPress installations often use directory permissions around 755 and file permissions around 644, but the correct values depend on server ownership and PHP execution model.
Do not solve permission errors by recursively setting 777. World-writable permissions are not a sound production fix and can create additional security risk.
If permissions look correct but writes still fail, verify filesystem ownership and whether PHP runs as the expected account user.
8. Verify disk space and temporary directories
An upload can fail even when WordPress itself is configured correctly if the server cannot write the temporary file or destination file.
Check:
- Account disk quota.
- Filesystem free space.
- Inode limits.
- PHP temporary upload directory.
- System temporary directory permissions.
- Hosting account resource limits.
On shared hosting, reaching a disk or inode quota can cause seemingly unrelated Media Library failures.
9. Check ModSecurity, WAF and security plugins
An upload request can be rejected by a web application firewall even when PHP and WordPress are healthy.
Potential sources include:
- ModSecurity rules.
- A hosting-provider WAF.
- Cloudflare or another reverse proxy.
- A WordPress security plugin.
- Rate limiting or bot protection.
A 403 or 406 response is a strong clue, although WAFs can return other statuses.
Review the firewall event log rather than disabling security globally. If a legitimate Media Library request is being blocked, create the narrowest possible exception for the specific rule or request pattern.
10. Check CDN and reverse-proxy limits
A CDN is usually associated with delivering cached files, but a reverse-proxy CDN also sits in the path of requests sent to WordPress. That means it may affect upload requests.
Check whether the upload works when:
- The CDN/proxy is temporarily bypassed for a controlled test.
- The same request is sent directly to the origin in a staging environment.
- Proxy request-size and timeout limits are reviewed.
If your WordPress site uses a CDN, see our WordPress CDN guide for a broader explanation of the origin, edge and caching layers.
11. Test for plugin conflicts
Plugins can hook into media uploads, metadata generation, image compression, offloading, security checks and cloud storage.
Common categories to investigate include:
- Image optimization plugins.
- WebP/AVIF conversion plugins.
- Media offload plugins.
- Security plugins.
- CDN integration plugins.
- Custom code that modifies attachment metadata.
On a staging site or during a maintenance window, disable likely candidates and retest. If the upload works, enable them one at a time until the failure returns.
Do not perform disruptive plugin testing on a busy production WooCommerce site without a rollback plan.
12. Test the theme only after plugin and server checks
The active theme can affect image sizes and attachment processing, although themes are less commonly the cause of a generic upload HTTP error than server limits or media plugins.
A theme may register many image sizes or add custom upload hooks. If the issue persists after basic server checks, test with a default WordPress theme in staging.
If the problem disappears, inspect the theme's image-related functions and registered thumbnail sizes.
13. Too many generated image sizes can increase processing cost
WordPress core, themes and plugins can each register image sizes. One uploaded photograph may therefore trigger several resize operations.
On a resource-constrained server, this can turn a normal upload into a CPU- and memory-heavy process.
Review image sizes if:
- Small images work but large photographs fail.
- Uploads work on a high-resource staging server but fail on production hosting.
- The error appears after installing a theme or image-heavy plugin.
- PHP logs show timeouts or memory exhaustion during thumbnail generation.
Do not unregister image sizes blindly. Themes and WooCommerce may rely on them for responsive layouts and catalog presentation.
14. Check PHP execution time and server resource limits
Image conversion can exceed execution or process limits on constrained hosting.
Relevant limits can include:
max_execution_time.- CPU limits.
- CloudLinux CPU or memory limits.
- Entry-process limits.
- Process memory limits.
- ImageMagick policy limits.
If the server kills the process, increasing only WordPress's memory constant may have no effect. Check hosting resource graphs and logs around the exact upload time.
15. Check the browser Network panel for the failing endpoint
Browser Developer Tools can often turn a vague WordPress error into an actionable one.
Open Network, upload an image and inspect the failed request. Depending on the upload path and WordPress interface, you may see a request to a WordPress media or upload endpoint.
Record:
- HTTP status.
- Response body.
- Request size.
- Request duration.
- Response headers.
A 413, 403 and 500 should lead to very different troubleshooting paths.
16. Enable WordPress debug logging carefully
If the server logs are not accessible, WordPress debugging may reveal a PHP fatal error caused by a plugin or media-processing hook.
On a controlled troubleshooting session, you can configure:
define( 'WP_DEBUG', true );
define( 'WP_DEBUG_LOG', true );
define( 'WP_DEBUG_DISPLAY', false );
Then reproduce the issue and review:
wp-content/debug.logDisable unnecessary debugging after diagnosis and protect logs from public exposure. Debug logs can contain paths, warnings and other operational information that should not be left publicly accessible.
17. Use server logs whenever possible
The most useful evidence is often outside WordPress.
Check:
- PHP-FPM error logs.
- Apache error logs.
- Nginx error logs.
- ModSecurity audit logs.
- CloudLinux resource faults.
- CDN/WAF event logs.
Look at the timestamp of a failed upload and correlate it with errors such as memory exhaustion, permission denied, upstream timeout, request body too large or a blocked firewall rule.
18. Do not use random .htaccess snippets as the first fix
Older WordPress troubleshooting articles sometimes recommend adding miscellaneous PHP, Imagick or server directives to .htaccess. This can create new failures when the hosting stack does not support those directives.
A safer order is:
- Identify the HTTP status.
- Check logs.
- Confirm active PHP limits.
- Check image processing.
- Check security/proxy layers.
- Change only the configuration responsible for the failure.
This is especially important on modern managed WordPress environments, where Apache, Nginx, PHP-FPM, LiteSpeed, a reverse proxy or containerized infrastructure may handle different parts of the request.
WordPress image HTTP error after migrating a site
If uploads worked before migration and fail afterward, compare the old and new environments.
Common migration-related differences include:
- PHP version.
- Missing Imagick or GD extension.
- Different PHP memory limit.
- Incorrect
uploadsownership. - New ModSecurity rules.
- Different Nginx request-size limit.
- Changed temporary directory.
- Different file paths or filesystem restrictions.
This is often faster than treating the migrated site as an entirely new troubleshooting case.
WordPress image HTTP error after an update
If the error begins immediately after a WordPress, plugin, theme, PHP or server update, use the timing as evidence.
Check:
- Which component changed.
- Whether the error affects all images or only specific files.
- Whether a plugin now hooks into media processing differently.
- Whether PHP extensions changed during the PHP upgrade.
- Whether ImageMagick/Imagick changed on the server.
Do not immediately downgrade production software without understanding the security implications. Reproduce the issue in staging where possible and use logs to identify the regression.
How to troubleshoot the error efficiently
For a managed WordPress workflow, the following order avoids unnecessary changes:
- Upload a known-good small JPEG.
- Record the HTTP status in Developer Tools.
- Check PHP and web-server logs.
- Compare the file size with PHP, proxy and CDN limits.
- Confirm free disk space, inode quota and upload-directory permissions.
- Check Site Health media information.
- Determine whether the original file is saved but thumbnail generation fails.
- Inspect Imagick/GD and PHP memory/resource limits.
- Review WAF and security events.
- Test media/image plugins in staging.
- Retest with a default theme only if needed.
- Verify the fix with both small and large representative images.
Common mistakes when fixing WordPress upload errors
- Setting permissions to 777. This is not a safe general fix.
- Increasing only WP_MEMORY_LIMIT. PHP or hosting limits may still be lower.
- Assuming every HTTP error is a file-size problem. 403, 413 and 500 failures have different causes.
- Changing multiple layers at once. You lose the ability to identify the real cause.
- Ignoring the server logs. The dashboard message is often less useful than the underlying error.
- Disabling the firewall permanently. Find and fix the specific false positive instead.
- Adding unsupported php_value rules to .htaccess. This can create a new 500 error.
- Uploading huge originals unnecessarily. Web images should generally be prepared for their actual use case.
Frequently asked questions
Why does WordPress say “HTTP error” when uploading an image?
It is a generic indication that the upload or image-processing request failed. Possible causes include request-size limits, PHP errors, memory exhaustion, Imagick/GD failures, filesystem permissions, security rules, proxy limits and plugin conflicts.
Why can I upload small images but not large images?
That usually points toward upload-size, memory, execution-time or image-processing limits. Large pixel dimensions can consume substantial memory even when the compressed file itself is relatively small.
What does HTTP 413 mean in WordPress?
HTTP 413 means the request body is too large for a limit enforced by a server, proxy, CDN or PHP-related layer. Identify which layer returns the status and increase the appropriate limit if the larger upload is legitimate.
Why is the original image uploaded but thumbnails are missing?
The upload likely completed and the failure happened during post-processing. Investigate Imagick/GD, memory, execution time, filesystem writes, metadata and plugins that process images.
Does increasing WP_MEMORY_LIMIT fix image upload errors?
Only when WordPress memory is genuinely the limiting factor and PHP permits the requested value. It cannot override a lower server-level PHP or hosting limit.
Can Cloudflare or another CDN cause WordPress upload errors?
A reverse proxy or WAF can affect request size, timeouts, firewall rules and rate limits. If the request passes through such a service, inspect its logs and limits as part of the troubleshooting process.
Should I switch from Imagick to GD?
It can be a useful diagnostic test when image post-processing fails, but the better long-term approach is to identify why the preferred image-processing stack is failing. Both editors have valid use cases.
What permissions should wp-content/uploads use?
Permissions depend on the hosting architecture and file ownership. Many Linux setups use directories around 755 and files around 644, but correct ownership matters as much as the numeric mode. Avoid 777 as a generic fix.
Conclusion
A WordPress image upload HTTP error is a symptom, not a diagnosis. The fastest route to a reliable fix is to identify the failed layer: request size, PHP, image processing, filesystem, security, proxy or plugin code.
Start with a small known-good image, capture the HTTP status, inspect the logs and determine whether the original file reaches the server. From there, adjust only the configuration responsible for the failure.
This troubleshooting approach is especially important in a managed WordPress environment, where performance and security layers must work together rather than be disabled one by one until the symptom disappears.
For related infrastructure topics, see our WordPress CDN guide, WordPress caching plugin guide and guide to avoiding nulled WordPress themes and plugins.