Installing a WordPress plugin is one of the most common tasks in website management. Plugins extend WordPress with features such as contact forms, SEO tools, backups, security, ecommerce, performance optimization and custom integrations.
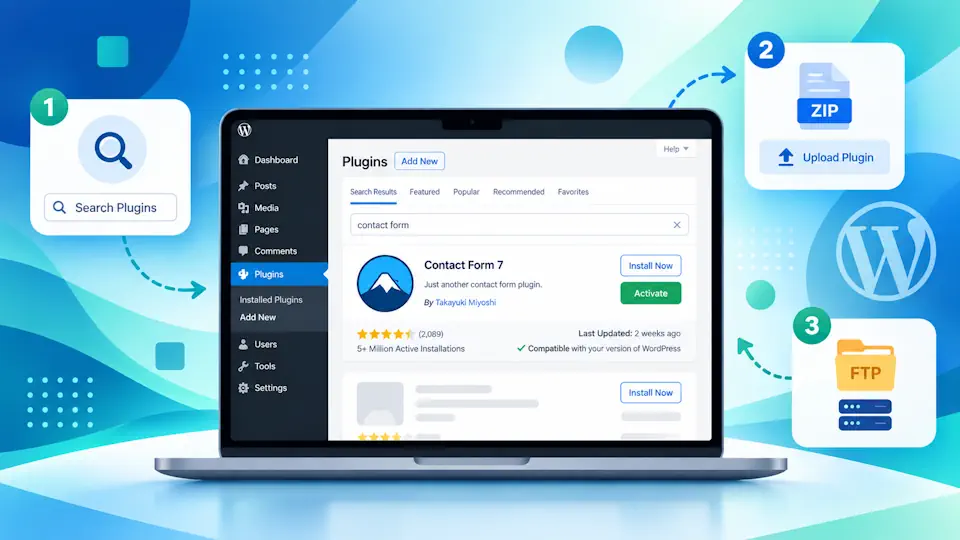
For most sites, the safest and simplest method is to install a plugin directly from the WordPress dashboard. You can also upload a ZIP file manually or install files through FTP or your hosting file manager when the dashboard method is not available.
This guide explains each method, what to check before activating a plugin, how to troubleshoot installation problems and how plugin installation fits into a reliable managed WordPress workflow.
What is a WordPress plugin?
A WordPress plugin is a package of PHP, JavaScript, CSS and other files that adds or modifies functionality without changing WordPress core files.
Plugins can add features such as:
- Contact forms.
- SEO optimization.
- Caching and performance improvements.
- Backups.
- Security and firewall functionality.
- WooCommerce features.
- Analytics and tracking.
- Membership or learning management tools.
- Custom integrations with third-party services.
The WordPress plugin ecosystem is one of the platform's biggest strengths, but it also makes plugin selection and maintenance important. Every plugin you install becomes part of the site's application stack and can affect performance, security and compatibility.
Before installing a WordPress plugin
Do not install a plugin only because it promises the feature you need. Spend a few minutes checking whether it is suitable for your site.
Useful checks include:
- Who develops and maintains the plugin.
- When it was last updated.
- Whether it is compatible with your WordPress and PHP versions.
- Whether support and documentation are available.
- Whether the plugin duplicates functionality you already have.
- Whether it has a good security and maintenance history.
- Whether you really need the plugin in production.
For commercial plugins, download the ZIP package only from the official developer, your legitimate customer account or another source you trust.
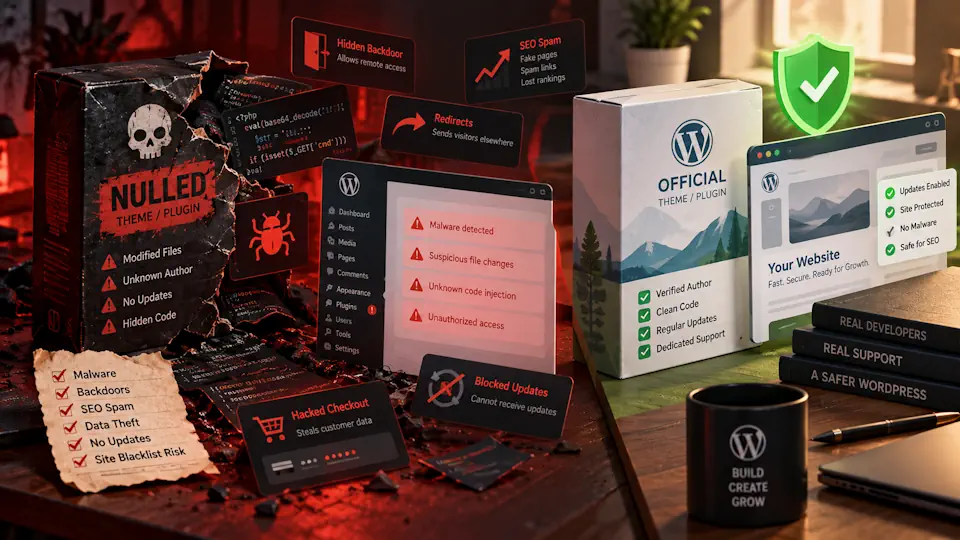
Avoid installing modified or redistributed premium packages from unknown websites. Our guide to nulled WordPress themes and plugins explains why untrusted packages create unnecessary security and maintenance risks.
Method 1: install a plugin from the WordPress dashboard
This is the easiest method for plugins available in the official WordPress plugin directory.
- Log in to the WordPress administration area.
- Go to Plugins → Add New Plugin.
- Use the search field to find the plugin you want.
- Review the plugin name, author and description carefully.
- Click Install Now.
- Wait for WordPress to download and unpack the plugin.
- Click Activate when the installation finishes.
After activation, the plugin may add a new menu item, settings screen, onboarding wizard or configuration notice.
Why the dashboard method is usually the best choice
Installing from the official directory has several advantages:
- You do not need to download or extract files manually.
- WordPress places the plugin in the correct directory automatically.
- The plugin can receive normal update notifications.
- The plugin page shows developer and compatibility information.
- Activation is available immediately after installation.
For normal production use, this is the preferred installation method whenever the plugin is available through the WordPress directory.
Method 2: upload a WordPress plugin ZIP file
Premium and custom plugins are often provided as ZIP packages instead of being listed in the public WordPress directory.
To install one:
- Download the plugin ZIP file from the developer or trusted source.
- Log in to WordPress.
- Go to Plugins → Add New Plugin.
- Click Upload Plugin.
- Select the ZIP file from your computer.
- Click Install Now.
- When installation completes, click Activate Plugin.
You normally do not need to extract the ZIP file first. WordPress expects the upload package to remain compressed.
Make sure you upload the actual plugin ZIP
Commercial products sometimes download as a larger package containing documentation, licenses, examples and the actual installable plugin ZIP.
If WordPress reports an error such as:
The package could not be installed.
No valid plugins were found.
the file you uploaded may not be the plugin package itself.
Open the downloaded archive locally and check whether it contains another ZIP file intended for WordPress installation.
Method 3: install a WordPress plugin through FTP
FTP or SFTP installation is useful when:
- The WordPress upload installer is unavailable.
- The ZIP upload fails because of server limits.
- You need to restore a plugin manually.
- The dashboard is partially unavailable.
- You are working with a development or recovery workflow.
The plugin directory is normally:
/wp-content/plugins/To install manually:
- Download the plugin ZIP file.
- Extract it on your computer.
- Connect to the server with SFTP or FTP.
- Open
wp-content/plugins/. - Upload the extracted plugin folder.
- Log in to WordPress.
- Go to Plugins → Installed Plugins.
- Find the uploaded plugin and click Activate.
The plugin folder should contain the plugin's PHP files directly. Avoid accidentally creating a double nested structure such as:
/wp-content/plugins/example-plugin/example-plugin/example-plugin.phpThe expected structure is usually closer to:
/wp-content/plugins/example-plugin/example-plugin.phpMethod 4: install a plugin using the hosting File Manager
If your hosting control panel provides a File Manager, you can install the plugin without a separate FTP client.
- Open the hosting File Manager.
- Navigate to the WordPress installation.
- Open
wp-content/plugins/. - Upload the plugin ZIP file.
- Extract the archive.
- Delete the ZIP file if it is no longer needed.
- Open Plugins → Installed Plugins in WordPress.
- Activate the plugin.
This method is convenient during troubleshooting because it also lets you rename or remove a plugin directory if activation later causes a fatal error.
Where WordPress stores installed plugins
Standard WordPress plugins are stored inside:
wp-content/plugins/Each plugin normally has its own directory:
wp-content/plugins/contact-form-plugin/
wp-content/plugins/security-plugin/
wp-content/plugins/cache-plugin/
Some special plugins may use wp-content/mu-plugins/. These are known as must-use plugins and behave differently: WordPress loads them automatically and they do not use the normal activation workflow.
Installing a plugin vs activating a plugin
Installation and activation are separate steps.
| Step | What happens |
|---|---|
| Install | The plugin files are copied to the WordPress server |
| Activate | WordPress begins loading the plugin and its functionality |
| Configure | You set the plugin options required for your website |
An installed but inactive plugin remains on the server but does not normally load its functionality on normal page requests.
Inactive plugins should still be kept updated if you intend to retain them. If you do not need an inactive plugin, deleting it is often cleaner than leaving unused software installed indefinitely.
What to do immediately after activating a plugin
Activation is not the end of the installation process. Test the website before assuming everything is working correctly.
A practical post-install checklist is:
- Open the homepage.
- Test important internal pages.
- Check the WordPress administration area.
- Review the plugin settings.
- Clear page and CDN caches if necessary.
- Check forms, navigation and interactive elements.
- Test WooCommerce cart and checkout if relevant.
- Review the browser console if the plugin affects frontend JavaScript.
- Check Site Health for new warnings.
If the plugin changes caching, scripts, CSS or image handling, test both desktop and mobile layouts.
How many WordPress plugins should you install?
There is no universal maximum number of plugins. Ten well-written plugins can be better than five poorly written ones, while a complex WooCommerce site may legitimately require many more plugins than a simple brochure site.
The better questions are:
- Does every plugin provide functionality the site actually needs?
- Is the plugin actively maintained?
- Does it duplicate another plugin?
- Does it add expensive database queries or frontend assets?
- Does it create security or compatibility concerns?
Plugin quality and architecture matter more than an arbitrary plugin count.
Installing plugins on WooCommerce sites
WooCommerce sites require more caution because plugin changes can affect transactional workflows.
After installing or updating a WooCommerce-related plugin, test:
- Product pages.
- Add to cart.
- Cart calculations.
- Coupons.
- Shipping methods.
- Checkout.
- Payment gateways.
- Transactional emails.
- Customer account pages.
For business-critical stores, test significant plugin changes on staging before applying them to production.
Why a staging site is useful before installing major plugins
Most simple plugins can be installed safely on a normal site, but high-impact plugins deserve testing first.
Examples include:
- Page builders.
- Security plugins.
- Caching and optimization plugins.
- WooCommerce extensions.
- Membership plugins.
- Migration tools.
- Plugins that modify the database schema.
A staging site lets you test compatibility without risking the live website. Once validated, the same change can be deployed to production with much lower uncertainty.
Plugin installation and WordPress backups
Take a recent backup before installing software that makes significant changes to the site.
A useful backup should include:
- The WordPress database.
wp-content.- Uploaded media.
- Theme files.
- Plugin files or a reproducible list of installed plugins.
The objective is not to create a backup before every tiny action. The objective is to have a reliable restore point before changes with meaningful risk.
How to install a plugin with WP-CLI
If you manage WordPress from the command line, WP-CLI can install and activate plugins quickly.
For a plugin available in the WordPress directory:
wp plugin install plugin-slug --activateYou can also install without activating it:
wp plugin install plugin-slugTo see installed plugins:
wp plugin listWP-CLI is particularly useful when managing multiple sites, scripting deployments or troubleshooting a dashboard that is not fully accessible.
Common WordPress plugin installation errors
“Installation failed: could not create directory”
This usually points to filesystem permissions, ownership or disk-space issues.
Check:
- Filesystem permissions.
- File ownership.
- Available disk space and inodes.
- Whether WordPress can write to
wp-content/plugins/.
“The uploaded file exceeds the upload_max_filesize directive”
The plugin ZIP is larger than the PHP upload limit.
Possible solutions include:
- Increase
upload_max_filesize. - Increase
post_max_sizeif required. - Upload the plugin through FTP or File Manager.
- Ask the hosting provider to adjust the limit.
“No valid plugins were found”
You may have uploaded the wrong ZIP package or an archive that contains another installable ZIP.
Verify the package structure and use the plugin ZIP intended for WordPress.
“Destination folder already exists”
WordPress found a directory with the same plugin folder name in wp-content/plugins/.
This can happen after:
- A failed previous installation.
- A manual upload.
- A plugin that was removed incompletely.
Confirm that the directory belongs to the same plugin before deleting or replacing it.
The site shows a critical error after activation
A plugin may conflict with the theme, another plugin, the PHP version or the current WordPress version.
If you can still access the dashboard, deactivate the plugin.
If the dashboard is unavailable, use FTP or File Manager and rename the plugin directory:
example-plugin
example-plugin-disabled
WordPress will no longer load it under the original path.
Plugin compatibility and PHP versions
A plugin can install successfully but still fail during activation or runtime because it expects a different PHP or WordPress version.
Before installing older plugins, check their compatibility requirements. Modern WordPress hosting commonly uses current PHP releases, while abandoned plugins may rely on functions that no longer behave as expected.
Do not downgrade PHP simply to preserve an abandoned plugin unless you understand the wider security and maintenance consequences. Replacing unsupported software is usually a better long-term solution.
Should you install a plugin manually if the dashboard installer fails?
Sometimes yes, but understand why the installer failed first.
If the problem is only a PHP upload-size limit, FTP or File Manager is a reasonable alternative. If WordPress cannot write to the filesystem because ownership or permissions are wrong, bypassing the installer may hide a broader hosting problem that should still be corrected.
Manual installation is a useful tool, not a substitute for diagnosing an unhealthy environment.
Plugin updates after installation
Plugins should be treated as maintained software, not one-time installations.
After installing a plugin:
- Keep it updated.
- Monitor compatibility with WordPress and PHP updates.
- Remove plugins you no longer use.
- Review security advisories when relevant.
- Test important updates on staging for critical sites.
Outdated plugins are a common source of WordPress security problems. A reliable maintenance process matters as much as the original installation.
Do inactive WordPress plugins need updates?
Yes, if they remain installed.
An inactive plugin still exists on the server. Vulnerable PHP files can sometimes remain reachable even when WordPress is not actively loading the plugin through its normal hooks.
If you intend to keep an inactive plugin, keep it updated. If you do not intend to use it again, remove it.
Installing plugins as part of Managed WordPress
In a managed WordPress environment, installing a plugin should be treated as a controlled change rather than an isolated click.
A good process includes:
- Confirm that the plugin solves a real requirement.
- Review the developer and maintenance history.
- Check whether existing functionality already covers the need.
- Take or confirm a recent backup.
- Test high-impact plugins on staging.
- Install and activate the plugin.
- Configure only the required features.
- Test frontend, admin and transactional workflows.
- Monitor performance and errors.
- Keep the plugin updated or remove it when no longer required.
This approach helps avoid plugin bloat while keeping client websites secure, supportable and easier to troubleshoot.
A WordPress plugin installation checklist
- Download the plugin from a trusted source.
- Check compatibility and recent maintenance.
- Confirm the plugin is actually needed.
- Have a recent backup for important changes.
- Use the WordPress dashboard when possible.
- Use the correct installable ZIP for premium plugins.
- Activate the plugin after installation.
- Review its settings.
- Test the website immediately.
- Clear relevant caches.
- Keep the plugin updated.
- Remove unused plugins.
Frequently asked questions about installing WordPress plugins
How do I install a WordPress plugin?
Go to Plugins → Add New Plugin, search for the plugin, click Install Now and then Activate. For premium or custom plugins, use Upload Plugin and select the provided ZIP file.
Can I install a WordPress plugin without the dashboard?
Yes. Extract the plugin and upload its directory to wp-content/plugins/ using SFTP, FTP or the hosting File Manager. You can then activate it from the WordPress Plugins screen.
Do I need to unzip a plugin before uploading it through WordPress?
No. When using Upload Plugin, upload the installable ZIP package. WordPress extracts it automatically.
Why can't I see the Plugins menu in WordPress?
Your user account may not have administrator permissions, or the site may be part of a multisite network where plugin installation is controlled by the network administrator. Managed environments can also restrict plugin installation intentionally.
Is it safe to install plugins from outside WordPress.org?
Yes, when the source is trusted, such as an established commercial plugin developer or your own development team. Avoid unknown redistribution websites and modified premium packages.
Can too many plugins slow down WordPress?
They can, but plugin count alone is not the main issue. Poorly written plugins, unnecessary database queries, frontend scripts and overlapping functionality matter more than the raw number of installed plugins.
Should I delete inactive plugins?
If you no longer need them, yes. Removing unused software reduces maintenance overhead and the number of files present on the server.
What should I do if a plugin breaks the site?
Deactivate it from the dashboard if possible. If WordPress admin is unavailable, rename the plugin directory through FTP or File Manager to stop WordPress from loading it, then investigate the compatibility or PHP error.
Conclusion
Installing a WordPress plugin is straightforward, but choosing and maintaining plugins responsibly matters just as much as the installation itself.
For most sites, start with Plugins → Add New Plugin. Use ZIP uploads for legitimate premium or custom plugins, and keep FTP or File Manager installation as a recovery and advanced-management option.
After activation, configure the plugin, test the website and keep the software updated. A disciplined plugin workflow is one of the foundations of a secure, fast and maintainable WordPress site.
As your WordPress stack grows, treat every new plugin as part of the site's architecture rather than as an isolated feature. That mindset is especially important in a managed WordPress environment where performance, security and reliable updates need to work together.