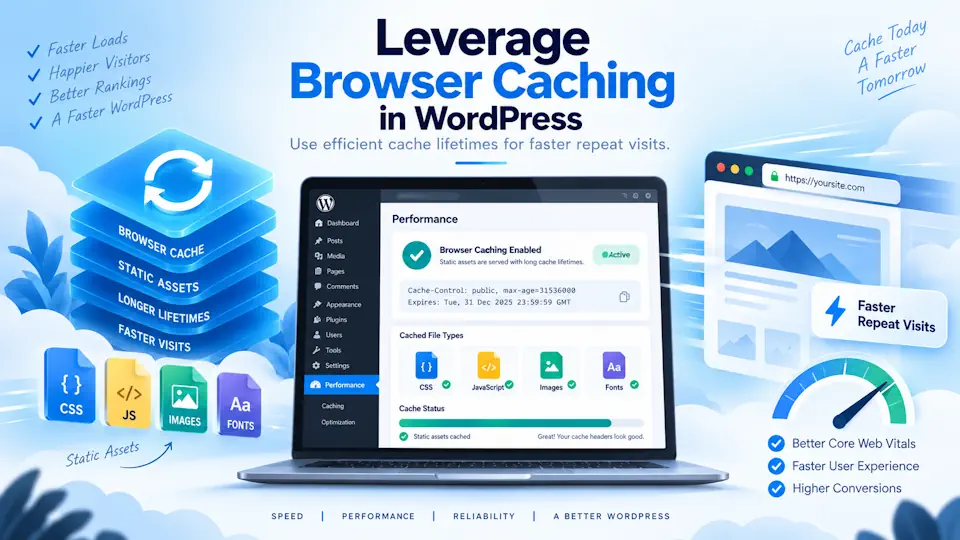
Browser caching is one of the simplest ways to make repeat visits to a WordPress website faster. Instead of downloading the same logo, stylesheet, JavaScript file, font or image every time a visitor opens another page, the browser can store those files locally and reuse them for a defined period.
The optimization was widely known as “leverage browser caching”, especially through older Google PageSpeed reports. Modern Chrome and Lighthouse terminology has changed, but the underlying principle remains important: static assets should use an efficient cache lifetime so browsers do not download unchanged files unnecessarily.
This guide explains how to leverage browser caching in WordPress, how Cache-Control and Expires headers work, which cache lifetimes make sense, how to configure Apache or Nginx, and when a WordPress caching plugin or CDN should manage the headers for you.
What does “leverage browser caching” mean?
To leverage browser caching means instructing a visitor's browser to keep reusable website files for a period of time instead of requesting a fresh copy on every page load.
Typical cacheable resources include:
- CSS stylesheets.
- JavaScript files.
- Images such as JPEG, PNG, WebP, AVIF, GIF and SVG.
- Web fonts such as WOFF and WOFF2.
- Icons and other static media.
The instructions are delivered through HTTP response headers. The most important is usually Cache-Control, although Expires headers are still commonly used for compatibility and server configuration.
WordPress itself does not automatically give every static asset a long browser-cache lifetime. The final policy can be controlled by the web server, caching plugin, CDN, reverse proxy or hosting platform.
“Leverage browser caching” vs “Use efficient cache lifetimes”
If you remember older PageSpeed Insights reports, you may have seen a recommendation called Leverage browser caching. The terminology has evolved. Current Chrome performance tooling describes the issue as Use efficient cache lifetimes, while older Lighthouse documentation used wording such as Serve static assets with an efficient cache policy.
The optimization goal has not fundamentally changed: cacheable static resources should normally be stored long enough that returning visitors do not repeatedly download the same unchanged files.
| Older terminology | Modern terminology | What you actually need to do |
|---|---|---|
| Leverage browser caching | Use efficient cache lifetimes | Send appropriate HTTP caching headers for static resources |
| Specify cache validators | Efficient HTTP caching | Use suitable cache directives and validation where required |
| Long expiration dates | Long cache TTL for immutable assets | Cache versioned CSS, JS, fonts and images for weeks or months |
This distinction matters when following older WordPress tutorials. The recommendation is still relevant, but the names shown in performance tools may be different.
Why browser caching makes WordPress faster
A typical WordPress page can reference dozens of static resources. On the first visit, those resources must be transferred over the network. On later page views, an effective browser-cache policy allows many of them to be reused locally.
This can provide several benefits:
- Fewer network requests for returning visitors.
- Less data transferred from your server or CDN.
- Lower latency when navigating between pages.
- Faster repeat page views.
- Reduced bandwidth usage.
- Potentially lower origin-server load.
Browser caching is especially useful because WordPress sites frequently reuse the same theme CSS, plugin JavaScript, fonts, logo and global interface assets across many pages.
It is important, however, to distinguish browser caching from page caching. A page cache stores generated HTML so WordPress does not need to rebuild the page for every request. Browser caching stores resources on the visitor's device. Both can be useful, but they solve different parts of the performance problem.
For a broader comparison of page caching solutions, see our best WordPress caching plugins guide.
How browser caching works
When a browser requests a file, the server returns the file together with HTTP headers. Those headers can specify whether the resource may be cached and how long the cached copy can be considered fresh.
A simplified response could include:
Cache-Control: public, max-age=31536000The max-age value is expressed in seconds. In this example, 31536000 represents one year.
During that period, the browser can normally reuse its cached copy without downloading the asset again. When the lifetime expires, the browser can request or revalidate the resource depending on the policy and validators in use.
Cache-Control vs Expires headers
Both headers can influence browser caching, but they are not identical.
| Header | Example | Purpose |
|---|---|---|
Cache-Control | public, max-age=31536000 | Defines modern caching behavior and the maximum freshness lifetime |
Expires | A future HTTP date | Defines an absolute date after which the resource is considered stale |
ETag | Resource-specific identifier | Allows validation of whether a cached representation has changed |
Last-Modified | Resource modification date | Can help the browser validate an older cached copy |
For modern configurations, Cache-Control is normally the main mechanism. Many WordPress performance plugins and Apache configurations still add Expires headers as well.
What cache lifetime should you use?
There is no universal lifetime for every resource. The correct value depends on how often a file changes and whether its URL changes when a new version is deployed.
As a practical starting point:
| Resource type | Typical strategy | Reason |
|---|---|---|
| Versioned CSS and JavaScript | Long cache lifetime | A changed filename or query version can force a fresh download |
| Images | Long cache lifetime | Uploaded media normally changes by receiving a new URL |
| Fonts | Long cache lifetime | Font files usually change rarely |
| Favicon and icons | Medium to long lifetime | Usually stable but sometimes updated without a filename change |
| HTML documents | Shorter or revalidated | Page content can change frequently |
| Personalized responses | Do not publicly cache without careful rules | Content may differ by user or session |
Chrome's current performance guidance treats static assets with at least a 30-day lifetime as a useful baseline and notes that immutable static assets can often be cached for a year. Long lifetimes work best when files are versioned so that a changed file receives a different URL.
Why file versioning matters with long cache lifetimes
The main risk of aggressive browser caching is stale content. If you tell a browser to keep style.css for one year and then replace the contents of that exact URL tomorrow, some returning visitors may continue using the old file.
Versioning solves the problem by changing the resource URL whenever the file changes. Common patterns include:
/style.css?ver=1.4.2
/app.8d92fc.js
/theme-v3.css
WordPress already adds version parameters to many enqueued scripts and styles. Build systems may instead generate hashed filenames. Either approach gives the browser a new URL when the asset changes.
This allows a useful combination:
- Very long cache lifetime for existing static files.
- Immediate download of a new file when its URL changes.
For assets that cannot be reliably versioned, use a more conservative lifetime.
How to leverage browser caching in WordPress
There are several valid ways to configure browser caching. The best method depends on who controls your server and which performance layers are already active.
Method 1: use a WordPress caching or performance plugin
For many WordPress sites, a performance plugin is the simplest solution. Established caching plugins can add browser-cache rules automatically or integrate with the server that provides them.
Plugins commonly used for this purpose include:
- WP Rocket.
- LiteSpeed Cache.
- W3 Total Cache.
- Other performance plugins or hosting-specific cache integrations.
WP Rocket, for example, adds browser caching directives to Apache-compatible .htaccess environments. LiteSpeed Cache can work closely with a LiteSpeed server stack. W3 Total Cache exposes more granular browser-cache configuration for administrators who want detailed control.
Do not install multiple caching plugins merely to obtain duplicate browser-cache rules. First determine which component already owns the caching configuration.
Method 2: configure browser caching in .htaccess on Apache
If your WordPress site runs on Apache and the host allows the relevant modules, browser caching can be configured directly in .htaccess.
A basic example using mod_expires could look like this:
<IfModule mod_expires.c>
    ExpiresActive On

    ExpiresByType image/jpeg "access plus 1 year"
    ExpiresByType image/png "access plus 1 year"
    ExpiresByType image/gif "access plus 1 year"
    ExpiresByType image/webp "access plus 1 year"
    ExpiresByType image/avif "access plus 1 year"
    ExpiresByType image/svg+xml "access plus 1 year"

    ExpiresByType font/woff "access plus 1 year"
    ExpiresByType font/woff2 "access plus 1 year"

    ExpiresByType text/css "access plus 1 year"
    ExpiresByType application/javascript "access plus 1 year"
</IfModule>
You can also use mod_headers to set a Cache-Control policy for selected static file types:
<IfModule mod_headers.c>
    <FilesMatch "\.(css|js|jpg|jpeg|png|gif|webp|avif|svg|woff|woff2)$">
        Header set Cache-Control "public, max-age=31536000"
    </FilesMatch>
</IfModule>
These are examples rather than universal copy-and-paste rules. Check the existing .htaccess file first. A caching plugin or host may already insert its own directives, and duplicate or conflicting rules can create confusing behavior.
Method 3: configure browser caching in Nginx
Nginx does not use .htaccess. The cache policy is normally set in the server configuration.
A simplified example for static resources is:
location ~* \.(css|js|jpg|jpeg|png|gif|webp|avif|svg|woff|woff2)$ {
    expires 1y;
    add_header Cache-Control "public";
}
After changing Nginx configuration, the configuration should be validated and the service reloaded using the normal server-administration process.
On managed hosting, you may not have access to the Nginx configuration. In that case, use the hosting control panel, a supported plugin or ask the provider which browser-cache policy is already active.
Method 4: configure caching at CDN or edge level
A CDN can also influence cache headers and browser TTL. Services such as Cloudflare, Bunny CDN and other edge platforms may let you define how long static resources stay cached in the visitor's browser as well as how long they remain cached at the edge.
Keep these concepts separate:
- Browser TTL controls how long the visitor's browser can reuse the resource.
- Edge cache TTL controls how long the CDN can serve its cached copy before checking the origin.
A long CDN edge lifetime does not automatically mean the browser receives an equally long lifetime. Review the response headers actually delivered to the visitor.
Do WordPress caching plugins automatically fix browser caching?
Some do, but the answer depends on the server.
On Apache, a plugin may be able to write browser-cache rules directly to .htaccess. On Nginx, WordPress plugins cannot normally modify the global web-server configuration in the same way. The host or control panel may therefore need to provide the headers.
Server-specific plugins can behave differently. LiteSpeed Cache, for example, is designed to integrate with LiteSpeed infrastructure. Managed WordPress hosts may provide their own caching layer and discourage additional page-cache plugins.
Before changing anything, inspect the existing headers. If static assets already return an appropriate Cache-Control policy, adding another plugin may provide no benefit.
How to test browser caching
You can verify the configuration without guessing.
Chrome DevTools
Open the browser's developer tools, select the Network panel and reload the page. Click a CSS, JavaScript, image or font request and inspect its response headers.
Look for values such as:
cache-control: public, max-age=31536000
expires: ...
On repeat requests, Chrome may show that a file was served from memory cache or disk cache instead of being transferred again.
PageSpeed Insights and Lighthouse
Modern Chrome performance reports can identify static resources with inefficient cache lifetimes. If a resource appears in the cache-lifetime insight, inspect which domain serves it and what headers that domain returns.
This distinction is important because not every flagged resource is under your control.
Command-line header check
If you have command-line access, you can inspect an individual resource with a HEAD request:
curl -I https://example.com/wp-content/themes/example/style.cssThe output lets you verify Cache-Control, Expires, ETag, CDN headers and other response metadata.
What if PageSpeed flags third-party resources?
This is a common source of confusion. A WordPress page may load scripts, fonts, widgets, analytics or advertising resources from external domains. You cannot normally change HTTP cache headers sent by a server you do not control.
Examples can include:
- Analytics scripts.
- Advertising platforms.
- Embedded maps or videos.
- Chat widgets.
- Social media scripts.
- Externally hosted fonts or libraries.
If a third-party asset has a short cache lifetime, adding rules to your own .htaccess file will not change it.
Your realistic options are to:
- Remove the third-party resource if it is unnecessary.
- Replace it with a lighter alternative.
- Self-host the asset when licensing and technical requirements allow it.
- Load it only on pages where it is required.
- Accept the external provider's cache policy when the service is necessary.
Do not chase a perfect performance score by breaking a feature that delivers real value to visitors.
Browser caching for WordPress CSS and JavaScript
Theme and plugin CSS and JavaScript are usually good candidates for long browser-cache lifetimes because WordPress commonly changes their URL version when the software is updated.
Before applying a one-year policy, confirm that your update process changes asset URLs reliably. If a theme overwrites a file without changing its URL or version parameter, returning visitors could temporarily receive the older cached copy.
After theme, plugin or custom-code deployments, test:
- Desktop and mobile layouts.
- Navigation menus.
- Forms.
- WooCommerce cart and checkout.
- Interactive JavaScript components.
- Critical CSS and deferred-script behavior.
If changes are not visible after a deployment, clear server and CDN caches first and verify whether the browser is still reusing an old asset URL.
Browser caching for WordPress images
Uploaded images are excellent long-cache candidates because WordPress normally creates a new media URL when a new file is uploaded. Existing image files usually do not need to change.
A long lifetime works particularly well for:
- WebP and AVIF files.
- JPEG and PNG images.
- SVG icons.
- Generated WordPress thumbnail sizes.
- Logos when the filename changes after redesigns.
If you repeatedly replace an image while keeping the exact same URL, browser and CDN caching can delay the visible update. Renaming the new file is usually safer than trying to force every existing cached copy to disappear.
Browser caching for web fonts
Fonts are normally stable and can be cached for a long period. Self-hosted WOFF2 files are particularly suitable for long browser-cache lifetimes.
When fonts are loaded from a third-party service, that service controls the headers. Self-hosting can give you more control, but it should only be done when permitted by the font's license and when it actually improves the overall setup.
Browser caching alone does not solve every font-performance issue. Preloading, font-display, font subset size and the number of font files can also affect loading behavior.
Should HTML be cached for one year too?
No. Static assets and HTML documents should not automatically share the same policy.
HTML is often updated when you edit a post, change a product, update pricing or publish new content. A very long browser cache for HTML can therefore cause visitors to see stale pages.
Page caching systems solve this differently: they may cache generated HTML on the server or CDN while still controlling browser freshness conservatively and purging the cache when content changes.
For this reason, avoid broad rules that apply a one-year browser cache to every response on the domain.
WooCommerce and browser caching
Static WooCommerce assets such as product images, CSS and JavaScript can benefit from browser caching. Personalized HTML and session-dependent data require more care.
Do not apply aggressive public caching indiscriminately to:
- Cart content.
- Checkout pages.
- Customer account pages.
- Personalized prices or availability.
- Session-specific API responses.
A reliable WooCommerce configuration separates long-lived static assets from dynamic customer data.
Common WordPress browser-caching mistakes
- Adding duplicate rules. The hosting platform, CDN and caching plugin may already set headers.
- Caching everything for one year. Dynamic HTML and personalized responses need different policies.
- Using long lifetimes without versioning. Visitors may keep old CSS or JavaScript after a deployment.
- Trying to fix third-party headers with .htaccess. Your server cannot change cache policy for a file hosted elsewhere.
- Confusing browser cache with page cache. They are separate layers.
- Ignoring CDN behavior. Edge TTL and browser TTL are not the same thing.
- Testing with “Disable cache” enabled in DevTools. This can make a correct browser-cache setup appear ineffective.
- Forgetting cache invalidation. A long lifetime needs a reliable way to expose new asset versions.
A practical browser-caching setup for WordPress
For a normal WordPress business site, a sensible process is:
- Check existing response headers before installing or changing anything.
- Identify whether Apache, Nginx, LiteSpeed, the hosting platform or a CDN controls browser caching.
- Use one clear configuration owner rather than stacking duplicate rules.
- Apply long lifetimes to versioned static CSS, JavaScript, fonts and images.
- Keep HTML and personalized responses under more conservative rules.
- Make sure changed assets receive a new URL or version.
- Test the final response headers with DevTools or
curl -I. - Run PageSpeed Insights or Chrome performance tools again.
- Test important site functionality after any caching change.
The objective is not simply to remove a warning from a performance report. The objective is to avoid unnecessary downloads while still ensuring visitors receive current content.
Frequently asked questions about leveraging browser caching in WordPress
What happened to the “Leverage browser caching” PageSpeed warning?
The terminology changed over time. Modern Chrome performance tooling focuses on efficient cache lifetimes for static assets, but the underlying optimization is the same: use appropriate caching headers so returning visitors can reuse unchanged resources.
How do I leverage browser caching in WordPress?
You can configure HTTP caching through a WordPress performance plugin, Apache .htaccess rules, Nginx server configuration, LiteSpeed settings, a CDN or your hosting platform. The correct method depends on your server stack.
What Cache-Control max-age should I use?
Versioned static assets can often use a long lifetime, commonly measured in months and sometimes a year. Chrome's current guidance treats at least 30 days as a useful baseline for cacheable static subresources. Dynamic HTML and personalized responses normally need a much shorter or different caching policy.
Is browser caching the same as a WordPress cache plugin?
No. Browser caching stores resources on the visitor's device. A WordPress page cache usually stores generated HTML on the server so PHP and database work do not have to be repeated. A performance plugin may manage both, but the caching layers remain conceptually different.
Can I fix third-party cache warnings in .htaccess?
No. Your .htaccess file controls responses served by your own compatible Apache server. It cannot change headers for scripts, fonts or other files delivered from an external domain.
Does browser caching improve Core Web Vitals?
It can improve repeat-load performance and reduce network work, but Core Web Vitals depend on many other factors. LCP can still be affected by image delivery and render-blocking resources, while INP depends heavily on JavaScript execution and interaction responsiveness.
Should I use both Expires and Cache-Control?
Many production configurations include both. Modern browsers primarily understand Cache-Control, while Expires remains common in Apache and caching-plugin configurations. Avoid conflicting values and verify the final response headers.
How do I know if browser caching is working?
Inspect a static resource in Chrome DevTools and check its Cache-Control or Expires response headers. On repeat navigation, the browser may show the resource as coming from memory cache or disk cache. You can also inspect headers with curl -I.
Conclusion
Leveraging browser caching in WordPress is fundamentally about giving static resources an appropriate lifetime. Images, fonts, CSS and JavaScript should not be downloaded repeatedly when nothing has changed.
Modern performance tools may call the recommendation Use efficient cache lifetimes rather than Leverage browser caching, but the practical solution remains the same: configure sensible Cache-Control or Expires headers, use long lifetimes for versioned static assets and avoid applying aggressive caching blindly to dynamic content.
For most WordPress sites, the cleanest approach is to let one layer own the policy: your caching plugin, web server, hosting platform or CDN. Verify the actual headers, make sure asset versioning works, and optimize based on real behavior rather than adding overlapping caching rules.
If you are also deciding how WordPress pages themselves should be cached, continue with our comparison of the best WordPress caching plugins.